
When it comes to AR photography in PokémonGO, there are some nifty tips and tricks you can use to manipulate the Pokémon into the concept you are creating. One popular theme among the AR community is tiny Pokémon.
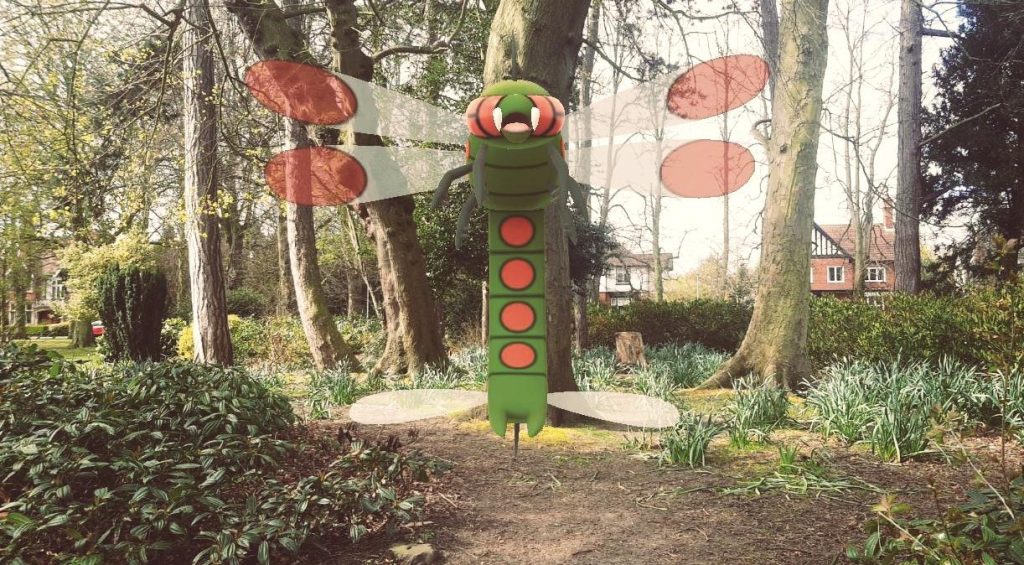
So for an example, this is a regular size Yanmega as it appears in AR mode usually. It’s pretty massive! Pokémon appear pretty much as their ‘real’ life size, so the bigger the Pokémon in game, the bigger they are in AR, some of the legendary Pokémon are huge. This can be problematic if you have an idea for a photo that the Pokémon simply won’t fit into, or if you don’t have the space. So below is another Yanmega, except this time it’s been made tiny, and is now a few centimeters, instead of a few feet in size.

There are two main ways to force your Pokémon to become tiny Pokémon. The first involves tricking the perspective.
Basically, pick the spot you want your Pokémon to appear in, and instead of asking it to spawn at that spot, get it to spawn in several feet behind where you want them to actually appear. The smaller you want them to be, the further away you need them to spawn in. Then walk back to where you want to photograph them, and they’ll appear to be really small in the shot. This does require some space as you need to place the Pokémon behind where you wish for it to be in the photograph, but it can be utilized to make them appear absolutely teeny tiny!
I used this technique for both of these shots in which the featured Pokémon is absolutely tiny compared to their usual size. Joltik has been made to be barely the size of a raindrop thanks to the extreme distance between where I had him appear, and where I actually photographed him.
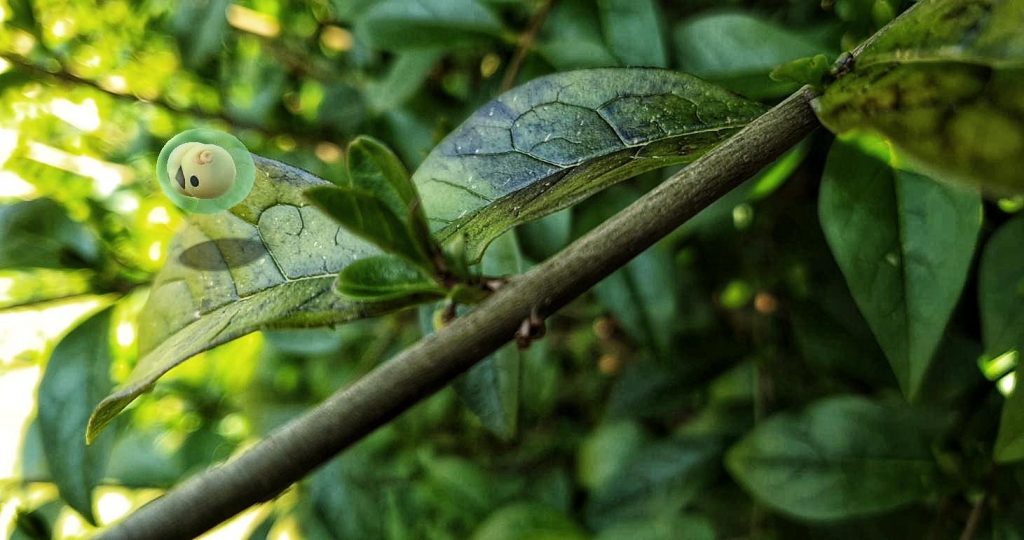
This also works with Pokémon who float, hover or fly in their natural states. Solosis here is smaller than a leaf, when it would usually be over a foot in size.
The other technique works better for when you can’t spawn in a Pokémon behind where you want them to be photographed. This time instead of tricking AR with perspective, you’re going to spawn the Pokémon in elsewhere, and move it to where you want it. It can be a little hit and miss, but it can work so well. What you want to do now is spawn your chosen Pokémon, and figure out how big you want it to appear in the photograph. Move away or around the Pokémon as necessary, and when you are happy, you are going to use your hand to completely cover the lens of your phone camera. Once covered, you move your phone so that your Pokémon is now roughly where you want them to be, and remove your hand. They may glitch or jump a little, but Pokémon naturally want to sit on things, so if you move them to a leaf for example, they will adjust themselves to be on that leaf if it recognizes it as the floor.
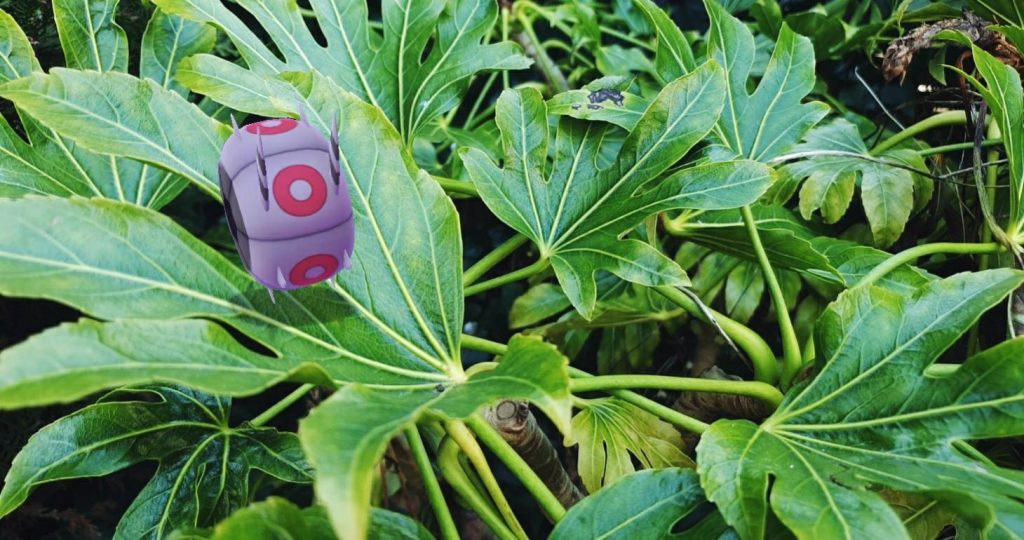
I used this technique with Whirlipede, as behind this plant is a fence, so it was impossible to use the perspective trick. Much like in the video above, I spawned the Whirlipede in over to the right, then used my palm to cover the lens, so I could move it to the leaf (albeit on a less windy day than when I made the video!)
These two tricks can be really useful for photographing Pokémon indoors too, when space is much more limited. So long as you can get a Pokémon to spawn, you can usually shrink them down to fit too. For example, if I wanted to photograph a Pokémon in my front room so it looked tiny, I’d get it to appear in my kitchen as it is behind my front room, and then move into my front room, or I’d use my hand to move the Pokémon elsewhere.
Tiny Pokémon give us the chance to photograph Pokémon in ways you might not usually be able to if we only photographed them life size, so get creative!
All photos and videos by kittypokemonsalot.